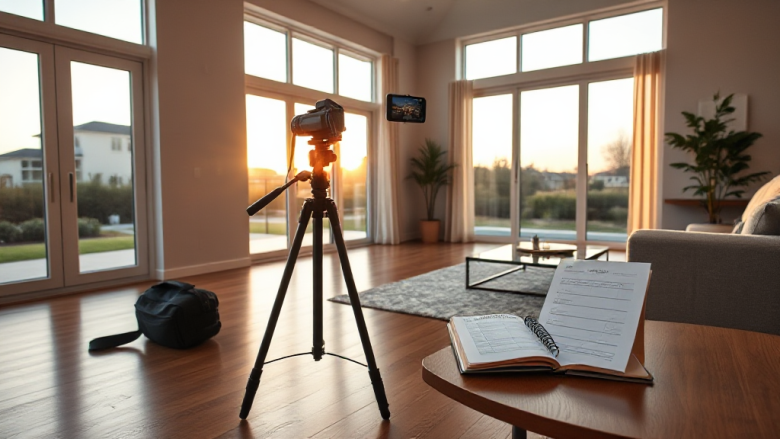
Buyers decide whether they care about a property in the first three photos. That’s not a guess. Watch people scroll a portal on a phone and you’ll see it happen: thumb, thumb, thumb, stop. Or thumb, thumb, gone. Your listing’s gallery is doing the work of a first showing, and it’s doing it before anyone sets foot in the house. I shoot my own listings with a phone and a cheap tripod, and I’ve made nearly every mistake worth making. Here are the real estate photography tips for listings I actually follow on shoot day, organized the way I walk a house: room by room, then the exterior, then the fixes that rescue a bad gallery.
Before You Press the Shutter
The photos are only as good as the room in front of the lens. I block two hours before a shoot for prep, and it’s the least glamorous, highest-return time I spend on a listing.
Declutter first, and be ruthless. Counters get cleared completely, not pushed to one side. Fridge magnets come off. Bathroom toiletries disappear into a drawer. Trash cans, pet bowls, phone chargers, and laundry baskets leave the frame. If a room has too much furniture to walk through comfortably, remove a piece or two and store it in the garage. Buyers read clutter as small, and small is the one thing you can’t edit out later.
Clean like the camera magnifies everything, because it does. Streaks on stainless steel, smudges on glass, dust on dark wood, and spots on mirrors all show up. Wipe down faucets and handles. Vacuum carpet edges where pet hair collects. If a window looks out onto something ugly, clean it anyway and deal with the view in the edit.
Light is the other half of prep. Turn on every lamp, every ceiling fixture, every under-cabinet light. Replace dead bulbs the day before. Open all blinds and curtains, but check what’s outside first: a bright white sky behind a dark room will blow out the window and leave the interior muddy. In that case, shoot the room twice, once exposed for the interior and once for the window, and blend later if you’re comfortable. If not, close the blinds partway and accept a softer window.
Set the house to neutral temperature. Warm light from a mix of bulb types makes rooms look orange and dated. If you can, swap the worst offenders for matched daylight bulbs before the shoot.
The Entry and Living Room Shots That Anchor the Gallery
Your first photo should be the strongest wide shot of the main living space, not the front door. Buyers want to see where they’ll spend their evenings, not a hallway.
Stand in the doorway or just inside the room’s corner and shoot diagonally across it. That angle shows two walls and gives the room depth. Get the camera height around chest level, not eye level; a slightly lower angle makes ceilings feel taller without tipping the verticals. If the room has a focal point, a fireplace, a big window, a built-in, place it roughly a third of the way into the frame rather than dead center.
Include the floor. A common amateur mistake is framing so much ceiling that the room looks squat. Aim for the bottom third of the frame to be floor or rug, the middle to be furniture, and the top to be wall and a sliver of ceiling. Tilt the camera down slightly if you have to, but keep the vertical lines of doorframes and windows straight.
Shoot the entry as its own image only if it’s genuinely a feature: a wide foyer, an arched doorway, a nice staircase. Otherwise fold it into the living room shot and move on. Nobody buys a house for a coat closet.
Kitchen and Dining: Where Most Galleries Are Won or Lost
The kitchen is the most scrutinized room in any listing, and it’s also the hardest to shoot. Tight galley kitchens and dark cabinets fight you. Here’s how I handle them.
Shoot from the corner that shows the most counter and the most cabinetry at once, usually the corner opposite the sink. If there’s an island, use it as a foreground element but don’t let it block the back wall. Get low enough that the island reads as a surface, not a wall.
Clear every surface. No dish racks, no paper towel holders, no knife blocks, no toasters. A single bowl of fruit or a small plant is the most you want. Open the cabinet doors under the sink if they’re a selling point, but close everything else. Nothing looks more chaotic than a few doors ajar.
Watch your reflection. Stainless appliances and glossy backsplashes will show you, your phone, and the tripod. Step to the side or shoot at a slight angle to keep yourself out of the frame. If you’re shooting a mirror finish fridge, angle away from it entirely.
Dining rooms are easier. Shoot from the corner that captures the table and the window together, and set the table lightly: a runner, two settings, maybe a bowl. Don’t stage a full dinner. The goal is to suggest how the room is used, not to sell dishes.
Bedrooms and Bathrooms: Honest, Bright, and Uncluttered
Bedrooms sell on light and space. Shoot from the doorway corner facing the window if possible, so the room reads bright and open. If the bed dominates the frame, back up or switch to a wider lens setting. Make the bed with plain, light bedding; busy patterns date a room instantly. Remove personal items from nightstands, and take down anything that identifies the current owner.
Bathrooms are the smallest rooms and the easiest to get wrong. Stand in the doorway, not inside the room, and shoot toward the vanity or the shower, whichever is the better feature. Close the toilet lid, always. Remove bath mats, towels, and anything on the counter. If the bathroom has no window, turn on every light and shoot at a slightly lower angle to catch the ceiling light without glare.
For both room types, shoot the closet if it’s a walk-in or a major selling point. Open the doors, turn on the light, and shoot straight in from the doorway. A dark closet photo helps nobody.
Exterior Shots and Curb Appeal
The exterior is where buyers form their first real opinion, and it’s the shot most agents rush. Don’t.
Shoot the front of the house at an angle, not straight on. A three-quarter view shows the depth of the facade and usually hides the garage door’s flatness. Get the whole house in frame with a little breathing room on all sides, and keep the vertical lines of the walls straight. If the house sits on a slope, find the spot where the roofline looks level.
Time of day matters more than gear. The best light for most front elevations is early morning or late afternoon, when the sun hits the facade at an angle and the shadows add texture. Midday sun flattens everything and blows out light-colored siding. If the house faces the wrong way, shoot from the side where the light is kindest, even if it means a less conventional angle.
Mow, edge, and water the lawn the day before if you can. Sweep the driveway and walkway. Put away hoses, trash bins, kids’ toys, and garden tools. If there’s snow, shovel the path and the driveway. If it’s fall, rake. The exterior shot is the one place buyers will judge maintenance, so make the maintenance obvious.
Shoot the backyard too, from the house looking out, and include any deck, patio, or pool. A pool shot from a low angle with the water reflecting the sky is worth the extra minute. If the yard is small, shoot from the corner of the house to make it feel deeper.
Lighting and Verticals: The Two Fixes That Rescue Any Gallery
If you take nothing else from these real estate photography tips for listings, take these two. They separate a professional-looking gallery from a phone snapshot more than any camera upgrade.
First, never use the flash. On-camera flash flattens rooms, creates harsh shadows behind furniture, and bounces off windows and mirrors. Turn it off and rely on the lights you turned on. If a room is still too dark, brace your phone or camera against a wall, a doorframe, or a tripod and use a longer exposure. A steady two-second shot beats a flashed one every time. If you’re shooting with a phone, tap the brightest part of the room to set exposure, then drag the exposure slider down slightly so the highlights don’t clip.
Second, keep your verticals vertical. Doorframes, window frames, and wall corners should run straight up and down in the frame. The moment they lean, the photo looks amateur. Fix it by holding the camera level, not tilted up, and stepping back rather than angling upward. If you can’t fit the room without tilting, switch to a wider lens setting or shoot from farther away. Most phones have a wide-angle option; use it, but keep the camera level or the edges will bow.
One more habit: shoot more frames than you think you need. Three angles per room, two exposures per angle, and a couple of detail shots. You’ll delete most of them, and that’s fine. The cost of a bad photo is a lost click, and clicks are the whole game.
How to Order the Gallery So Buyers Keep Scrolling
Order matters as much as quality. Think of the gallery as a story that answers a buyer’s questions in the order they ask them.
Lead with the best wide shot of the main living space or the exterior, whichever is stronger. That’s your hook. Second, the kitchen, because it’s the room buyers care about most. Third, the primary bedroom. Fourth, the primary bathroom. Fifth, the remaining bedrooms and bathrooms. Sixth, any special features: basement, attic, garage, workshop, sunroom. Seventh, the backyard and any outdoor living space. Close with a couple of detail shots that show quality: a fireplace, a nice fixture, a view.
Keep the gallery between fifteen and twenty-five photos. More than that and buyers stop paying attention; fewer and they wonder what you’re hiding. Put your weakest photos in the middle, never at the end. The last image is a real estate photography tip of its own: it’s the one buyers see right before they decide to save the listing or move on.
Frequently Asked Questions
Can I shoot a listing with just my phone?
Yes, and you should if that’s what you have. A modern phone with the flash off, the camera braced, and the verticals kept straight will outperform a cheap camera used carelessly. The limits show up in very dark rooms and very wide spaces, where a dedicated wide lens helps. Until you hit those limits, spend your money on a tripod and a set of matched bulbs, not a new camera.
What time of day is best for exterior photos?
Early morning or late afternoon for most homes, when the sun rakes across the facade instead of hitting it head-on. Overcast days are actually excellent for exteriors because the light is even and the sky doesn’t blow out. Avoid harsh midday sun on light-colored siding, and shoot the front and back at different times if the house faces a direction that fights you.
How many photos should a listing have?
Fifteen to twenty-five is the sweet spot for most homes. Lead with your strongest wide shot, cover every room a buyer expects to see, and include the exterior and yard. If a room is small or awkward, one honest wide shot is better than three angles that emphasize the problem.
Should I edit my photos?
Basic edits are fine and expected: straighten the verticals, brighten a dark room, correct the white balance so the walls look white instead of orange. What you shouldn’t do is stretch a room, remove permanent fixtures, or change the color of the siding. Buyers will see the house in person, and a gallery that oversells is a wasted showing for everyone.